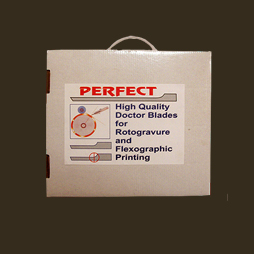

Doctor Blades are extremely smooth lamella and non lamella ( round edge) blades and used for wiping out the excess ink in flexographic or rotogravure printing and coating processes. They are also used for printing and coating on paper, films sch as PET, BOPP, PVC and foils used in packaging labeling, publication & corrugation industries.
‘Perfect’ Brand Doctor blade plays a vital role in bringing quality printing and coating. An incorrect / substandard doctor blade, if used can bring down the printing quality substantially and is likely to increase the chances of bringing down the efficiency of printing cylinder both in terms of its on line life and quality output. In this way, right kind of doctor blade becomes an integral part of this type of printing.
The ‘Perfect Brand’ Doctor blades are designed in such a way that they provide the optimum printing quality at a fairly reasonable cost. Ther lamella smooth edges provide a perfect clean wiping action on the Gravure cylinder / anilox roller on instantaneously. The raw material used for making ‘perfect Brand’ doctor blade is High Carbon Steel strips exclusively made for Doctor blade.
The ARS indicator ( Angle reflective scope indicator) device will help the machine operator to check and evaluate the true contact angles that a used doctor blade has after being run on a gravure cylinder. Often, methods developed to help a press crew set the blade angles on start-up fail to take into account issues such as blade deflection caused by wiping pressure or how parallel a blade is set from one end of the cylinder or roll to the other.
The preferred method to checking the doctor blade running angle is to take a sample piece from each end of used blade. This will give you the running angle and tell you how parallel the blade holder was set to the cylinder. These samples should be cut from an area of the blade that falls about 4 to 5 inches in from each end of the cylinder face. You may mark the blade before pulling from the press or look at the blade tip after cleaning to find the start of the wear face area.
Many Gravure Blades are adjusted during a run, causing multiple contact facets to be worn into the blade tip. It is important to find and record all wear angles that are present in any one given blade. This can indicate that there were problems with the blades during that print run. If, during your checking, you see a bright line that is present for more than 5 to 10 degrees, this indicates a rounding of the wear tip. This may indicate one of two possible problems. The first is excessive cylinder run-out. This can be caused by worn cylinder bearings. The second is worn doctor blade oscillating mechanisms. Either one of these conditions causes the blade tip to continuously shift its contact angle to the cylinder while the press is running. This condition may show up in the print as scumming, hazing, tailing, or streaking that comes and goes in a cycling pattern.
There are two different appearances that you will see when looking at the reflected light of a used Gravure Blade. The first is a bright light caused by a mirror type finish on the wear face. This is caused by metal-to-metal contact between the blade tip and the cylinder surface. This can happen when high angles and/or heavy loading pressure were used in setting or running the blade. The second appearance is a duller light caused by a matte or dull finish on the blade tip.
This can be caused by light wiping pressures or by highly abrasive ink such as TiO2 whites. While the dull finish is preferred, both the dull and the mirror surfaces have been observed on good running presses.
NOTE: If you see scratches across the blade tip running in the same direction of the cylinder, you may have one other problem. Scratches are usually caused by foreign particles in your ink. These could be dried ink, doctor blade steel particles, or board dust. Ink filtering is important to protecting both you blades and your cylinders. If your blades are getting scratched, then it is likely that your cylinders are, too.
Many conditions may be analyzed by reading the contact angles of your used blades. On a closed chamber system, checking both the metering and the containment blade are very important. Reading average contact angles between both blades will tell you if the chamber is centered on the anilox roll centerline. NOTE: Some presses will run a longer extension on the containment blade, which reduces the wiping angle of it when compared to the metering blade. If you check the contact angles on both ends of each blade, it will provide you with valuable information and the chamber settings. As an example, if the gear side shows the metering blade wear angle is higher than the containment blade, but on the operator side the metering blade wear angle is lower, this would show that the chamber is skewed or out of level, with the anilox roll center line. On the other hand, if the gear side angles on both blades show a lower setting than on the operator side, this would indicate that the chamber is not parallel to the roll.
Our Products

